Types of Pool Cleaners

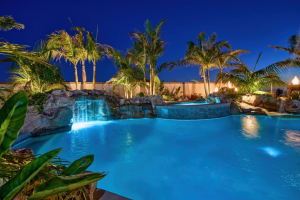
The pool is a fun place to cool off on a hot day, but it can also pose serious hazards for unsupervised swimmers. Make sure a lifeguard is on duty and that a fence with self-closing gates surrounds your pool area.

Maintain proper chemical levels with chlorine (available in granules and tablets) and algaecide. Keep your water’s pH balanced by testing it regularly and using a product to adjust as needed. Contact The Woodlands Pool Company now!

Traditionally the most popular type of pool cleaner, suction cleaners connect to your pools existing filtration system and use the full power of the main circulation pump to “suck” debris from the floor of the pool, and pass it through to your filter for removal. They can also be paired with a booster pump to help them climb walls and get to hard-to-reach corners of your pool.

Because they sit close to your pool floor, they have a tendency to “churn” the bottom of your pool which can cause wear and tear on your liner. These cleaners are also more susceptible to clogging than other types of cleaners. They do a good job of vacuuming your entire pool floor, but don’t typically climb walls or go up the waterline very far. They are less expensive than pressure side or robotic cleaners but more costly to operate than other options.

Pressure side cleaners have a motor that drives the cleaner along your pool floor and sometimes up your walls, pushing water through the cleaner which creates a venturi effect that scrubs the surface of your pool. This type of cleaner puts more strain on your pool filter and requires more maintenance items like a tail scrubber, wear rings, bearings, tires, etc. to keep them running smoothly. If you have a lot of “stuff” in your pool it may be worth the extra investment to get this type of cleaner.

Robotic cleaners do not require a connection to your pool’s main filtration system, instead they run on their own independent power and move around the pool on their own. They can also be plugged into the bottom of your pool, freeing up the pool skimmer to “skim” leaves and debris. They are a more expensive option, but many customers find that they pay for themselves in time saved and money savings from not having to clean the pool manually.

BWT’s top-rated robotic cleaners feature multi-directional scrubbing brushes to fully scour your pool, dual or triple power-draining vacuum pumps for optimal cleaning, and intelligent sensor navigation that maps out the most efficient path to clean your whole pool. Plus, they can be controlled remotely and put on programmable cleaning cycles.

Manual Pool Cleaners

Manual vacuum cleaners require a hands-on approach to cleaning that relies on the user to maneuver and direct the vacuum head to every part of the pool. This level of control offers a customizable, customized cleaning experience that is particularly effective for hard-to-reach areas like corners, steps and stubborn debris spots. Because of this, manual vacuum cleaners tend to be less expensive than their robotic counterparts.

Unlike suction-side, pressure and robotic cleaners, which utilize their own motors and filtration systems to function, manual vacuum cleaners rely on the pool’s existing filtration system to work, meaning they can place more strain on the system and require more frequent filter cleaning and replacement. Additionally, if the filter becomes too clogged during use, it can impact the performance of the cleaner itself.

As a result, while they are cost-effective and simple to operate, manual vacuum cleaners may not be as effective in cleaning larger pools with more difficult-to-reach areas or thicker algae deposits. In general, these devices are best used as a supplement to regular pool maintenance and for occasional deep cleanings.

In addition to being a great choice for those on a budget, this model also boasts one of the most lightweight and portable designs among our top picks. The unit only weighs 5.5 pounds, making it easy to maneuver around the pool, even when working in tight spaces or reaching deeper ends of the pool.

The design is also durable, with a strong build that includes both stainless steel and nylon bristles to help tackle tough dirt and grime. In our tests, this model performed well during cleanings and was especially effective in tackling stuck-on dirt and algae stains.

Compared to other models we tested, this manual vacuum cleaner has the longest battery life of all our top picks and comes with a wall charger and one all-purpose filter bag as well as two disposable micro-filter bags. It is also designed to be quick and easy to use, with a setup process that typically takes no more than 15 minutes. While it doesn’t offer the same depth and thoroughness as other models, this vacuum is an ideal choice for those who prefer a no-frills cleaning system that can quickly and efficiently remove pesky leaves from a pool.

Chemical Pool Cleaners

Choosing the best pool chemicals is essential for keeping your water healthy and crystal clear. With a little bit of knowledge, understanding which products work for you and maintaining a regular routine, keeping your swimming pool clean is an easy task that anyone can do!

Chlorine tablets and liquid chlorine keep your water sanitised, keeping bacteria at bay. This is particularly important for indoor pools that are not exposed to natural bacteria-killing sunlight.

pH balancers keep your water at the correct level by reducing the acidity in your pool to make it easier for other chemicals to do their jobs. This is especially critical for chlorine levels as high acidity makes it more difficult for the chlorine to do its job effectively.

Total alkalinity is an important balancing chemical that increases the efficiency of chlorine by slowing down changes to the water’s pH level. It helps your chlorine last longer and keeps the water in a safer, more comfortable range for swimmers.

A clarifier works by combining with particles in the pool, making them large enough to be trapped by your filter. This helps prevent them from returning to the water and causing cloudy or dirty pool water. Some clarifiers contain ammonium chloride or crab shell extract.

If your pool contains a lot of debris, such as leaves, twigs and dirt, you may need a cleaner that moves the debris into your filter. These are typically robotic cleaners that can be controlled from your smartphone using the iAquaLink app.

Shocking your pool is a process that drastically raises chlorine levels for a short amount of time, killing any bacteria and burning any sanitiser byproducts. It’s a good idea to shock your pool at least once per week or fortnight.

As with any chemicals, it is essential to read and follow the label instructions carefully. It’s also recommended that you wear gloves, eye protection and a face mask when working with any pool chemicals. Be sure to store all chemicals properly and out of reach from children and pets. They should also be stored in a cool, dry place with proper ventilation.

Automatic Pool Cleaners

Whether you’re a pool cleaner expert or not, having a good automatic pool cleaner can reduce the amount of work it takes to keep your pool in shape. Choosing the right one depends on how much you want to spend, your current pool set-up, and how often you intend to use it.

A good automated cleaner can save you a lot of time and stress, freeing you up to spend more time doing the things you enjoy. However, before making a purchase, it’s important to look beyond star ratings and verified feedback to get an accurate picture of which models perform well and which don’t.

Most suction-side pool cleaners are powered by a motor and a pump that creates suction to collect debris. They also have a filtration system that traps the debris and prevents it from re-entering the water. Some models have disposable filters, while others use reusable cartridges that require regular cleaning.

These machines have sensors in their bump bars that detect objects such as walls and direct the machine to avoid them. They also have a delay timer that keeps the pumps off for a few hours at night, allowing suspended particles to settle on the bottom of the pool before starting the cleaning cycle.

In contrast to suction-side cleaners, robotic cleaners have their own internal pumps and filtration system, which means they’re independent of the pool’s main filter and pump system. This allows them to clean more of the surface area than suction-side cleaners. Some models also feature interactive modes, which enable you to customise your robot’s operation and maximise its effectiveness.

Robotic cleaners also have features like a programmable timer that allows you to set your cleaner to start and stop at specific times of the day, converting it into a hands-free pool cleaning assistant. Other models are equipped with smartphone capabilities, which allow you to control your robot from anywhere.

Traditional pressure-side and suction-side cleaners have their advantages, but they’re no match for modern robotic cleaners. Their high energy consumption and extra wear on the pool equipment drive up utility bills, and their tendency to get stuck or clogged can lead to expensive repairs.

Pest Control Made Easy: Basic Tips and Tricks

Pests disrupt natural processes and pose a threat to humans by contaminating food products or by spreading diseases such as leptospirosis, salmonella, and hantavirus. They can also damage structures and cause fire hazards by chewing wires.

Pest Control

Threshold-based decisions should be made regarding whether or not to control a pest and what control method to use. Control methods include prevention, suppression and eradication. Contact Pest Control Nampa for professional help.

Prevention is a way of controlling pests before they cause damage, and it is the goal of most people when it comes to managing their own homes or business premises. It involves eliminating the conditions that attract pests in the first place. For example, ants can smell food from a distance, so the best way to deter them is to store foods in odor-blocking and securely sealed containers. Garbage should also be regularly removed from the premises, and clutter should be eliminated as much as possible. In hospitality, retail and food preparation settings, cleaning up spills and crumbs as soon as they occur, repairing leaky plumbing and putting out traps for rodents can help prevent pest problems.

The Integrated Pest Management (IPM) approach to pest control focuses on prevention primarily. It monitors pests and their activities, and if the monitoring, identification and action thresholds are met, less risky pest controls such as biological control, changing cultural practices or habitat manipulation are used before resorting to more aggressive pesticides. If these methods are ineffective, IPM programs then evaluate the tolerance level of the pest, and then choose the proper control method.

Eradication is a rarely used method for outdoor pest situations, but it may be required when specific types of pests are not acceptable in indoor environments such as hospitals, retail or food processing. These areas generally require a higher degree of hygiene, and there are strict health standards that cannot be violated by the presence of certain pests. These include physical contamination of food products by rodent droppings, insect parts and intestinal worms; contamination with disease-causing bacteria from the pests themselves; and direct damage to buildings and their services.

Suppression

Pests interfere with human activities by contaminating food, destroying property or spreading disease. The goal of pest control is to reduce their numbers to an acceptable level while causing as little harm as possible to people, property or the environment. Many organisms may be considered pests, including insects, rodents, weeds and birds. There are three methods of pest control: prevention, suppression and eradication. Prevention is the preferred method in most situations, but sometimes it is impossible or impractical to prevent a problem from occurring, and pests must be controlled. Suppression involves reducing the number of pests to an acceptable level, and is most often accomplished through a combination of tactics such as monitoring, habitat manipulation, cultural controls and use of resistant varieties.

Integrated Pest Management (IPM) is a holistic approach to pest control that relies on long-term prevention rather than short-term chemical interventions. It uses natural pest control methods such as biological control, changing cultural practices, habitat manipulation and use of resistant varieties before resorting to pesticides. Pesticides are used only when monitoring indicates they are needed according to established guidelines, and are applied in a manner that minimizes risks to humans, beneficial organisms and the environment.

The most important step to effective pest control is learning about the pests you have and your options for controlling them. Then take action to remove their food, water or shelter — clean up trash and debris around your home, store foods in sealed containers, fix leaky plumbing and make sure your garbage is removed regularly. Also, don’t let water collect in trays under house plants or in sinks or bathtubs.

Eradication

Unlike prevention, which is about stopping a pest from getting to a level where it causes damage, eradication means destroying an entire population of the pest. This is the goal of a few pest control methods, such as spraying plants with carbon dioxide or nitrogen (which are inert gases) to deprive them of oxygen and cause them to die. This is a common technique in museums and greenhouses to kill insects that have invaded sensitive plants.

Many invasive foreign plants are targeted for eradication because they have proven to be detrimental to agriculture and natural habitats. For example, invasive foreign weeds often overrun cropland and taint crops such as hay. They also occupy riparian corridors, estuaries and forests, crowding out native species and creating monocultures that alter ecosystem function. Similarly, the Sutter County Pest Eradication Program targets weeds that have been shown to be a significant threat to local agricultural and wildland resources.

Eradication strategies are usually complex and require a thorough understanding of the organism’s biology and ecology. The reproductive rate of an invasive species, for instance, is highly variable throughout the world and depends on a complex interplay among microbes in their human and intermediary hosts. It is crucial that the eradication strategy take into account this variability in order to be successful.

The use of microbial pesticides such as the bacteria Bacillus thuringiensis, or Bt, is another form of eradication. These microbial pesticides are sprayed on soil and, when ingested by the insect, they release a toxin that kills it from the inside. Because of their low toxicity to humans and animals, microbial pesticides are a good alternative to conventional pesticides.

Other forms of microbial pesticides include parasitic nematodes, which are microscopic worms that live in the soil. When sprayed on the soil, these nematodes will kill unwanted insect populations such as fleas, grubs and gnats. However, nematodes do not have a long shelf life and must be applied regularly to remain effective.

Mechanical or Physical Controls

Many gardeners want to avoid pesticides, but the reality is that they often need to take steps to control unwanted insects and other critters. The goal of Integrated Pest Management (IPM) is to use the least-toxic methods possible to achieve desirable results. This means finding ways to kill or keep pests at levels that do not pose unacceptable esthetic, health or economic harm. The decision of when to take action depends on threshold levels, which are based on a number of factors, including frequency and duration of pest sightings, severity of damage, and the cost of control measures.

Physical or mechanical control methods either kill the pest directly or make the environment unsuitable for infestation. Examples include traps for rodents, mulches for weed management, steam soil sterilization for disease control in vegetable crops, and barriers such as screens to exclude birds or insect pests from fruit trees. Structural pests such as earwigs can be deterred by covering their holes with diatomaceous earth, which is made from finely ground skeletons of fossil algae and has sharp edges that scratch and dehydrate soft-bodied insects.

Cultural control involves changing the pest’s environment to reduce availability of food, water and shelter. For example, yellow-fever mosquitoes breed in swamps and stagnant pools of water, which can be controlled by draining these areas. Cultural methods also involve altering irrigation practices to minimize excess water, which can lead to root rot and weed problems.

Biological or natural enemies are organisms that attack and kill pests, such as parasitoids and predators. These can be introduced intentionally into the environment, or encouraged by growing plants that repel or attract natural enemies. This approach requires extensive research into the biology of pests and their natural enemies, as well as care in selection and release to ensure that beneficial effects are achieved with minimum risk to people or other animals.

Natural Forces

Natural forces such as climate, predators, parasitoids, nematodes and competitors can affect pest populations. They may prevent them from growing or limit their reproduction, cause disease or death or reduce their availability as food or shelter. Some of these natural enemies can be introduced to a crop, and some methods can be used to supplement their action (natural enemy release). This includes releasing relatively few natural enemies at the right time of year or literally millions at once (inundative release) and changing management practices to better support them (habitat manipulation).

Plant pathogens can also infect pests and slow their growth or damage their cells. Insects can be infected with bacteria, fungi, protozoans and viruses that reduce their rate of feeding or kill them. Nematodes (microscopic worms) can attack insects that damage crops by injecting them with a toxic bacterium.

Environmental conditions such as temperature and moisture influence pests’ emergence, growth, development, and reproduction. Some landscape features, such as mountains and bodies of water, restrict the movement of pests. Pest populations typically thrive only as long as their roosts, food and water supplies are available.

Threshold-based decision-making means observing and monitoring pests to determine whether their numbers have reached or are about to reach unacceptable levels. It also involves choosing the most appropriate control measures and applying them with minimal disturbance to the environment.

For example, a few flies or caterpillars in the vegetable garden probably won’t require control, but a wave of mosquitoes might. Monitoring and scouting can help identify the best physical, biological and chemical control methods. In the case of chemicals, spot applications and the use of less persistent materials minimize contact between beneficial organisms and pesticides.

How to Avoid Common Concrete Repair Problems

Repairing concrete can be challenging and time consuming. It’s important to take safety precautions, allocate enough time and budget, and consider professional help when necessary.

Concrete Repair

Structural repairs address cracks that impact the integrity of the surface, while decorative repairs focus on aesthetics.

Concrete surface cracks are common and, when not properly repaired, can cause safety hazards. They can also lead to water leaks and structural damage, which will add up over time. With proper maintenance, cracks can be kept to a minimum and repairs are much less costly than ignoring them and dealing with the consequences later.

The first step is to clean the area around the crack with a pressure washer and detergent. This will help the repair material adhere to the existing concrete. In wide cracks, chiseling is done to create a backward angled cut in the concrete to open up the crack and provide a wider surface area for the repair to bond with. This can be messy work but is necessary to ensure the repair will hold.

Next, the existing concrete is roughened up with a wire brush to give the repair material something to grip onto. A bonding agent is then painted on the existing concrete and allowed to dry until tacky. Different bonding agents require slightly different application methods, so it is important to follow the directions for your product carefully.

Then it is time to get to work repairing the crack. For this, either epoxy or latex crack filler can be used. Epoxy is ideal for larger cracks, and can be used to seal joints as well. The repair must be allowed to cure thoroughly before traffic is permitted.

For narrow cracks, a non-sag concrete caulk can be used. This is especially suited for outdoor applications because it can flex with expansion and contraction of concrete caused by temperature changes, moisture content and weather conditions.

A good quality non-sag concrete caulk will have a rough surface texture to better adhere to the concrete and be more durable than smooth surfaces. In addition, it will be resistant to chemicals and abrasion.

Repairing Leaks

Using the right materials and procedures can help you repair leaks in concrete. Leaks can be caused by a variety of factors such as weathering, aging, and damage from traffic or construction activities. If left unattended, the moisture from these leaks can cause serious damage and even lead to structural failure in the concrete structure.

It is essential to identify the source of the leak and to correct the problem quickly. Moisture leaking into concrete walls, floors, or basements can lead to the growth of mould spores which can eventually degrade the concrete. Depending on the extent of the damage, the concrete may need to be removed and replaced.

There are many different products available to repair leaks in concrete. These include foams, quick-setting patching mortars, and epoxies. Quick-setting patching mortars are cement-based materials that can be troweled to a smooth surface. They are designed to be non-shrink and slightly expansive to help them bond with the existing concrete.

A good quality patching material should also be resistant to freeze-thaw cycles and have a high compressive strength and flexural strength. For long-lasting repairs it is important to choose a product that has been tested and approved by a recognized testing agency for use in concrete repair.

For larger concrete structures or buildings, shotcrete may be the best option for repairing leaks and other damage. Shotcrete is a technique that involves shooting a mixture of cement, aggregate, and water at high speed onto the damaged concrete surface. This method of repair is fast, efficient, and versatile.

Before applying the repair material, it is a good idea to spray down the area with water. This will hydrate the concrete and ensure that the new material bonds with the existing concrete. It is also a good idea to spray down the repair area on a warm day to avoid losing too much water into the old concrete as this can lower the strength of the final concrete repair.

It is best to hire a professional contractor for all concrete repair, protection, and strengthening projects. A professional has the expertise, equipment, and materials to ensure that the concrete repair is done correctly and will last. A qualified concrete repair contractor will also perform inspections during the construction process to make sure that the work is being done in accordance with the International Concrete Repair Institute (ICRI) standards and that all necessary safety precautions are being taken.

Repairing Spalling

Spalling occurs when part of a concrete surface chips, flakes, or peels away, leaving pitted or patchy areas behind. This problem is more serious than just an aesthetic concern. It weakens the overall structure and leaves it vulnerable to further damage from moisture, freezing temperatures, and corrosion. Unless properly repaired, spalling can lead to more widespread cracks and crumbling of the concrete.

Spall repair can be done by replacing the damaged concrete with new material or resurfacing the entire area. This is an inexpensive solution for small areas with light spalling and can rejuvenate the concrete for a like-new appearance. For larger areas with deeper spalls or pitting, the best solution may be to completely remove and replace the concrete.

The first step in any concrete repair is to clean the affected area to ensure that the new repair material will bond well with the existing concrete. This should include removing all loose spalling and delaminated concrete. It is important to sound the existing concrete to determine the depth of the spalls and to establish the boundaries of the repair area. This information will help the contractor design a repair that will be cost effective and durable.

After the concrete is cleaned, it should be dampened to help prevent it from pulling moisture from the new repair material as it dries and shrinks. This can be accomplished by covering the repair area with a damp burlap sheet or by placing it under a plastic cover. It is also important to adjust sprinklers to prevent water from pooling around the patch and saturating it with excess moisture, which can cause the concrete to spall.

Once the damaged concrete has been cleaned and prepared, it can be patched or resurfaced with a concrete resurfacing product. These products can be purchased from many home improvement centers and do not require a lot of technical expertise or equipment to use. It is recommended to choose a concrete resurfacing product that has been independently tested for durability and performance. Some products achieve very high early strengths, but these properties often come with a trade off in long-term service life and permeability.

Repairing Potholes

Concrete potholes are one of the most common and frustrating issues that homeowners, business owners, and commercial property managers face on their paved surfaces. These shallow depressions in the ground are not only unsightly, but they also pose a tripping hazard and can cause damage to vehicles.

Addressing potholes promptly is the best way to minimize their effects and prevent them from becoming more significant problems, which can require expensive repairs or even replacement. In addition, routine inspections and concrete repair can extend the lifespan of your paved surfaces.

Identifying the type of concrete surface and condition is the first step in determining the correct repair method. It is also important to note the type of weather conditions that the repaired area will be subjected to, as these factors can have a significant impact on how well the concrete repair material performs.

Once the type of surface and the repair method have been determined, it is then possible to determine the required materials. In general, the repair product should be chosen based on its performance characteristics, ease of use, and cost. It is also recommended that you opt for a repair product that is suitable for the environment in which it will be used, and that offers a range of safety features.

Some examples of popular concrete repair products include epoxies and polyurethane injections, which are known to be effective for filling cracks and voids in concrete. Other options include slurry seal, which is a mix of water, cement, and fine aggregate, that can be applied to concrete surfaces to repair minor cracks, chips, and surface deterioration.

It is recommended to seek the advice of a professional contractor for any large-scale projects or repairs in high places. These professionals have the equipment and expertise necessary to complete these tasks safely, effectively, and with minimal disruption. They can also offer warranties and insurance coverage to protect their work from damage or accidents.

In some cases, it may make more sense to replace rather than repair a concrete surface. This is particularly true for older concrete that is experiencing severe wear-and-tear, or if the root cause of the problem is poorly installed base. If the concrete sinks more than 8″, for example, it might be more economical to simply remove and replace it.

The Basics of Centrifuge Tubes

Centrifuge tubes are a crucial component of laboratory equipment. They separate samples by density, isolate nucleic acids, and purify proteins.

When choosing the right centrifuge tube, consider the following factors: material, capacity, graduated volume, and sterilization. Whether you’re looking for plastic or glass, snap cap or plug-sealed, multicolored or clear, we have the centrifuge tubes to fit your needs! Contact Stellar Scientific now!

The material used to make centrifuge tubes should be chemically resistant to the reagents and solvents you’ll use in your experiments. Look for glass, plastic, or stainless steel tubes. Stainless steel centrifuge tubes are more durable and can withstand higher speeds and temperatures. Plastic tubes, on the other hand, are easier to handle and more versatile in terms of application.

Some plastic materials include PP (polypropylene), PE (polyethylene), and PS (polystyrene). Choose one that suits your specific needs and laboratory applications. PP is transparent with good thermal stability and resists chemical reagents. It can also withstand autoclaving. PE has a clear appearance and is resistant to acid and alkali, but it can become soft at high temperatures. It can also be stained by some organic substances, which makes it ideal for one-time use.

Besides the material, consider the type of cap that your chosen tubes have. Some are topped with screw seals that ensure a tight and leak-proof fit during centrifugation and sample storage. Snap caps and plug seals are other types that you can choose from.

Choose a color that will help you distinguish between different samples. Some sterile tubes are available in clear, amber, or colored options to aid in identification and organization. Some are also certified to be free from RNase, DNase, human DNA, pyrogens, and PCR inhibitors.

Centrifuge tubes are a vital piece of equipment in every lab. It is important to select the best tubes for your specific experiment, and follow proper handling and maintenance protocols to ensure accurate results. By taking the time to understand these important properties and features, you can find the perfect centrifuge tube for your lab. With so many options available, finding the right centrifuge tube for your needs is easy with a little research and knowledge of common lab equipment. Whether you’re working with separating blood components or determining cholesterol levels, there’s a centrifuge tube that will fit your lab needs. Shop with a reputable online laboratory supplier to get the best deals on industry-leading brands of centrifuge tubes.

Capacity

Choosing the right centrifuge tube capacity is a crucial factor in many laboratory applications. By ensuring that the tubes have a sufficient volume for the required experiment, scientists can prevent sample spillage during separation and ensure accurate results. In addition, selecting the correct size will also help scientists save on laboratory resources by avoiding excess reagents and other materials.

Centrifuge tubes are available in a range of sizes, with capacities from as low as 0.2 mL to over a few liters. This allows for a great degree of flexibility in many laboratory applications, from processing minute biological samples to handling bulk chemical substances.

When choosing the appropriate capacity, it is important to consider the sample volume and the maximum operational speed of the centrifuge. Using a tube that is too small can result in inefficient separation and sample loss, while a tube that is too large may damage the centrifuge or cause the samples to spill out during spin.

It is also important to select a centrifuge tube that is compatible with the rotor used for spinning. While there are a number of standard formats that can be used with most centrifuges, it is important to check with the rotor manufacturer to make sure that the specific model and configuration will work well with your tubes.

Another consideration is the ability of the tubes to withstand temperature fluctuations and other environmental factors. Look for plastic tubes that are autoclavable and made from durable materials that can withstand repeated use and handling. In addition, opt for tubes that are clear and have writable surfaces to facilitate labelling and identification.

Lastly, be sure to choose a centrifuge tube that is easy to clean and will maintain its structural integrity when subjected to rigorous use and manipulation. It is recommended that you select a tube that can be easily cleaned in a mild laboratory detergent solution and rinsed thoroughly with warm water. In addition, a good quality centrifuge tube should be able to be stored in a cool and dry location that is protected from chemical fumes, ozone, and ultraviolet light.

Application

Centrifuge tubes are used for a wide variety of applications, from separating blood components to isolating nucleic acids and purifying proteins. They are indispensable tools for laboratories across multiple scientific disciplines, and the correct selection of tubes is important for ensuring accurate results and optimal performance in your experiment. With a little knowledge about the basics of centrifuge tubes, including capacity options, material and application-specific features, you can make the right choice for your specific laboratory needs.

The material of your centrifuge tubes will determine their resistance to chemicals and heat, as well as how long they can withstand centrifugation speeds and temperatures. Polypropylene, for example, is a popular choice among centrifuge tube manufacturers because it’s durable and can handle high-speed spins without losing its contents or structural integrity. Other materials, such as glass and stainless steel, can withstand higher temperatures and are better at resisting certain chemicals.

It’s also important to consider the closure type of your centrifuge tubes, as this will affect their security and ease-of-use. Screw caps, snap caps and plug seals are common options that provide a secure fit to prevent leakage and spills during centrifugation. Additionally, some tubes have specialized markings or writing areas to facilitate sample identification and measurement, and they may be compatible with automated systems to streamline sample processing.

You’ll also want to choose a centrifuge tube that is compatible with your specific application, such as a clear or amber model that protects light-sensitive samples. Many centrifuge tube models are available in graduated and non-graduated options, allowing you to measure the volume of your sample precisely. You can also find tubes that are labeled with printed or moulded graduations for quick, convenient measurements.

Finally, make sure you purchase centrifuge tubes that are certified safe for use in your laboratory. This means they have undergone stringent quality control measures to ensure that they are free from impurities and other contaminants, and that they meet specific specifications for dimensions and durability. Additionally, you should always wear proper protective equipment when handling hazardous materials or working with centrifuge tubes.

Safety

Centrifuge tubes are manufactured under stringent quality control measures to ensure their structural integrity and performance. Manufacturers conduct various inspections and tests throughout the production process to uphold their product standards. This reduces variance and provides consistent results, helping to ensure the integrity of your experiment’s data. You can verify these standards by looking for certifications and documentation with the packaging of your tubes.

You should also pay attention to the maximum speed and relative centrifugal force that is recommended for the specific tubes you’re using. Exceeding these limits can damage or break the tubes. Additionally, the high g-force produced by spinning at excessive speeds can potentially cause your samples to explode or fly off of the rotor. It is important to note that you can find centrifuge tubes made from different materials. Some plastics are easier to clean and sterilize than others, while some metals are more durable. Additionally, you can find centrifuge tubes in different shapes and sizes.

Another factor to consider when choosing your centrifuge tube is its capacity. Make sure you purchase a tube that is large enough to hold your sample, and be careful not to overfill the tube. A tube that is too full can be difficult to handle and will likely leak during centrifugation.

In addition to choosing the right type and size of centrifuge tube for your experiments, you must also make sure that all of the tubes are sterile. You can use a centrifuge tube cleaner to help ensure that your tubes are free from bacteria and other contaminants before they are used in an experiment. The most common centrifuge tube cleaners are phenolic, methyl iodide, or isopropyl alcohol. You can also choose a non-toxic alternative such as dimethyl sulfoxide (DMSO).

When you’re working with centrifuge tubes, always wear appropriate personal protective equipment. This includes a lab coat or gown, gloves, safety goggles, and closed-toed shoes. This will prevent chemical spills and broken glass from causing injuries. You should also wait until the centrifuge machine has stopped spinning before opening the lid. Some samples can aerosolize during spinning, and inhalation of the particles may cause injury or illness.

Why It’s Important to Choose an Eye Doctor You Trust

An eye exam can reveal a lot about your overall health. That’s why choosing an eye care professional you trust and feel comfortable with is important.

During your visit, the optometrist or ophthalmologist may have you follow his finger to test visual acuity or ask you to identify colors on a chart. Click My Eye Doctor Towson to learn more.

An eye exam is the most effective way to keep your eyes healthy. Your doctor will perform many tests and procedures while you sit in a comfortable padded chair. They will take a detailed medical history and measure your visual acuity (how clearly you can read letters on an eye chart). They will also check how your eyes move and focus together, and evaluate your peripheral vision or side vision to see if one eye is seeing less than the other.

A comprehensive eye exam can include a close inspection of the front and inside the eye with a microscope called a slit lamp or an autorefractor. This allows them to see the ocular adnexa (the area around the eye) and the lens, cornea, pupil and iris. It can also reveal abnormalities such as astigmatism, which is a common refractive error that makes it hard to see objects at different distances.

Your eye doctor will also test your color vision, and may have you cover one of your eyes. They will then ask you to try and focus your exposed eye on a target, which could be a light or an object. This helps them to determine how well your eye muscles work as a team, and it can highlight issues such as muscle weakness or a tendency to drift one eye to the side.

This is a key part of your eye exam, as it can pick up on conditions such as glaucoma, which causes high pressure that damages the optic nerve and can lead to blindness. It can also show if you are developing age-related macular degeneration or diabetic retinopathy, which affect the blood vessels in the retina and can also lead to loss of vision.

A final key part of the exam is a measurement of your optical prescription to ensure that you have the right amount of lens power to provide clear vision. This can be calculated using a variety of methods, including a manual procedure where your eye doctor shines a bright handheld light into your eyes and measures how your pupils react to get an approximate prescription.

Contact Lenses

Contact lenses are thin discs of plastic or glass that sit directly on the eye to correct vision. They are available in a variety of materials, modalities, and prescription ranges to suit most eye conditions. Proactively recommending contact lenses to patients allows the ECP to enhance the patient’s experience and satisfaction with the practice.

Soft contact lenses are the most common type and are typically made of flexible, water-holding plastic. They are very comfortable and are easily adapted to wearing, even by children. They can be worn with the fingers or with a special solution, and they can be used daily or on a weekly schedule.

Hard contact lenses, also known as Rigid Gas Permeable (RGP) contact lenses, are more durable and allow for greater oxygen flow to the cornea. They may initially be more uncomfortable than soft contacts, and they can create a slightly “dry” feeling in the eyes. They are suitable for a wide range of eye conditions, including astigmatism and corneal ectasia.

Hybrid contact lenses combine the durability of RGP with the comfort of soft contacts. They contain a hard RGP center surrounded by an outer ring of soft material and can be more convenient for some patients than RGP alone.

If you wear contact lenses, it’s important to follow proper cleaning and storage procedures. These can help you avoid eye infections like Acanthamoeba keratitis and keep your lenses clean and safe for longer wear.

Other problems can arise from contact lens use, including a corneal abrasion or infection, which can be serious if left untreated. In severe cases, eye injuries can cause corneal ulcers or scarring that requires medical attention.

The best way to reduce the risk of injuries from contact lens wear is to follow your eye doctor’s recommendations and take good care of your lenses. Your eye doctor will tell you how often to change your lenses and how to properly insert and remove them. You should also use preservative-free lens solutions to reduce the risk of infections. There are also specialty contact lenses designed to protect the eyes from trauma. For example, there are lenses that shield the eyes from UV light and others that have built-in glare reduction to improve photography.

Glaucoma Treatment

If you have glaucoma, your eye doctor will prescribe medications to reduce eye pressure. They may also recommend surgery. These treatments are very beneficial for your eye health. They can delay or prevent blindness.

Most people don’t notice glaucoma symptoms until they’re very advanced, so early diagnosis is critical. That’s why it’s important to get regular dilated eye exams.

Glaucoma happens when the drainage canals in the eye become clogged, which leads to a buildup of pressure that damages the optic nerve. If left untreated, glaucoma can lead to permanent blindness.

The most common treatment is prescription eye drops, which lower IOP. These are also known as ophthalmic solutions or topical solutions. They work by improving the aqueous fluid outflow or reducing how much aqueous fluid is produced. You’ll need to take these eyedrops daily. It’s important to follow your doctor’s instructions on how and when to take them. If you have a loved one with glaucoma, help them establish a routine and stay on schedule with their eyedrops. You could offer to remind them or arrange transportation to their follow-up appointments.

Another glaucoma treatment is laser surgery, called laser trabeculoplasty or LTP. During this procedure, your doctor uses a laser to create tiny spots in the front part of your cornea. This helps open the blockage in the drain canal. Your aqueous fluid should drain more easily after the surgery, which lowers your IOP.

In some cases, your eye doctor will recommend surgery if medicine and laser therapy fail to control your IOP. This includes acute closed-angle glaucoma, which causes a sudden buildup of pressure in the eye, and narrow-angle glaucoma.

If you have a history of glaucoma in your family, you may be at higher risk for developing it yourself. The condition is inherited and your first-degree relatives (parents, siblings, and children) have an almost 1 in 4 chance of developing it in their lifetime. People with a history of diabetes or high blood pressure are at an increased risk as well. It’s also more common in women than men.

Eye Surgery

Eye surgeries can correct a variety of conditions. The most common is refractive surgery, which corrects vision problems such as myopia (nearsightedness), hyperopia (farsightedness) and astigmatism by reshaping the cornea, the clear outer layer of the eye. This allows the retina to properly focus incoming light rays, improving vision. This procedure is performed in a doctor’s office or at a surgery center. Eye drops are applied to numb the eyes; a mild pain reliever may be offered if necessary. You must wear an eye shield after the procedure to protect your eye from accidental contact or rubbing, as this can interfere with the healing process.

Other types of eye surgery include muscle surgeries to alter where the muscles attach to the eyeball — a condition called strabismus, which causes your eyes to point in different directions and creates double vision. These can be performed on the upper or lower eyelids, or both. Another type of surgery — blepharoplasty — repairs the muscle that opens the eyes by removing excess fat and skin, or repairing damage from an injury.

There are several procedures to repair a detached retina, including freezing and laser treatments. In a procedure known as pneumatic retinopexy, your doctor uses an injection of air to fill the center of your eyeball, creating a gas bubble that presses against the retina to help it reattach. The surgeon also may use a freezing treatment, or shine a laser at the retina to “weld” it in place.

Some eye surgeries require general anesthesia, but most can be performed under local anesthesia with a sedative to keep you calm. Your doctor will explain your options before the procedure. People who are pregnant or have a medical condition such as reflux, back pain, or emphysema should alert the doctor before the surgery. These issues can make it difficult to remain still for an extended period of time during the sedation, which can interfere with the effectiveness of the meds. Your doctor will monitor your progress and let you know when the surgery is safe for you to resume activity.

Four Steps to Choosing an Implant Dentist

Unlike dental bridges or dentures, implants replace both the tooth and its root. This helps preserve the natural shape of your face and restores full chewing ability.

The first step in getting an implant is evaluation and planning. This includes dental imaging studies, such as X-rays and panoramic films. Contact Implant Dentist Las Vegas now!

If your jawbone is too soft to hold the metal implant, a bone graft may be required. This involves transplanting bone from another area of your mouth or a synthetic bone-substitute material.

Getting Started

Choosing an implant dentist is an important decision for anyone who wants to replace missing teeth. A dental professional with specialized training in this area of dentistry can ensure you are getting the best results and that you will be comfortable throughout the procedure. They will be able to answer any questions you have about the procedure and walk you through what to expect.

The first thing to do when choosing an implant dentist is to find out whether they have completed any formal education courses in this area. A quick online search will show you any qualifications and experience they have in this field. You should also look into how long they have been practicing. Having years of experience is a good sign, as it means they have developed their skills over time.

Another thing to consider is whether the implant dentist you are considering has taken any hands-on training courses. These types of courses can be very useful in gaining the knowledge and confidence needed to perform this type of surgery. You can also learn more about dental implants by reading online articles and blogs that cover the topic. Many of these sites offer a variety of opinions from different professionals. You can also listen to podcasts, such as the Smile Bulletin Podcast from Glidewell, which discusses various opinions on dental implants with top clinicians in the field.

In addition to learning the basics of implant dentistry, it is also a good idea to attend a continuum course that covers all aspects of this specialty. This is often the best way to get fully proficient in this area of dentistry. Continuum courses are usually run by universities or well known accomplished educators, such as the Misch Institute. They are generally several months in length and will cost around $10,000 for equipment and CE.

After taking your initial implant placement and restoration courses, you should focus on building up your practice. This will allow you to gain a better understanding of how to treat these patients and to develop a full-scale implant treatment plan.

Preparation

Embarking on the journey towards dental implants is a transformative experience that promises renewed confidence and functionality. However, meticulous preparation is essential for a successful surgery and recovery process. Here are four steps to help you prepare for your implant dentist journey:

Consultation

The first step in any dental procedure is a consultation with the implant dentist. During this visit, the dentist will review your medical history and examine your teeth and jaw to ensure that you’re a good candidate for dental implants. This is also the time to ask questions and address any concerns that you may have.

During the exam, the implant dentist will check the state of your jawbone to make sure it has sufficient density and volume to hold an implant. This is done through X-rays and CT scans, which provide a detailed look at the structure of your mouth and jaw.

If the dentist discovers that your jawbone is too soft or thin to hold an implant, a bone graft can be performed to add density and volume. This typically involves surgically removing tissue from the jaw or upper gums, then placing it into the deficient area. Once the graft heals, an implant can be placed.

It’s also important to consider any medications or supplements that you’re taking, as some of them can interfere with the success of dental implants. The implant dentist will inform you of any medications or supplements that need to be stopped or avoided before your surgery.

Prior to the day of your procedure, you should start preparing for the surgery by cleaning your mouth thoroughly and addressing any problems, such as infection or gum disease. If necessary, these issues can be treated with periodontal treatment before the surgery.

On the day of your surgery, you’ll need to secure transportation to and from the doctor’s office. The anesthetic will prevent you from driving, and it’s best to have someone available to drive you back home afterward. You should also avoid consuming any alcohol, as it can inhibit your ability to safely undergo sedation.

Implant Placement

Whether replacing one or more teeth, dental implants offer a natural-looking, comfortable and durable alternative to dentures or bridges. The procedure typically begins with a consultation and exam at an implant dentist, where the patient is able to discuss his or her expectations for treatment. The dentist will take the patient’s medical history and conduct a physical exam, taking into consideration any current health concerns. A comprehensive dental imaging exam will also be performed, using a 3D cone beam CT scan to provide a more detailed view of the area and to determine if there is adequate bone density in the jaw to support an implant.

In some cases, a patient may require a bone graft to augment the quality and quantity of bone where an implant will be placed. During the implant placement phase, a special titanium screw-shaped implant post will be surgically inserted into the bone, covered with gum tissue and allowed to heal. During this time, a temporary prosthesis will be attached to the implant. Depending on the location and complexity of the implant, this can be a single-stage or two-stage procedure.

When choosing an implant dentist, consider the provider’s level of experience. While many general dentists perform implant placement, it’s important to choose a dental implant specialist who is certified in the process through a continuum course. This type of training is more extensive than a traditional degree, and covers all aspects of implantology from diagnosis to restoration.

It’s also a good idea to look for an implant dentist who is a member of a professional organization such as the International Congress of Oral Implantologists or the Academy of Osseointegration, as these organizations require their members to meet high standards of education and training and adhere to strict ethical guidelines. This ensures that the doctor is well-versed in implant dentistry and has access to ongoing education and support for his or her patients.

Finally, it’s a good idea to find out if the dental implant specialist offers a warranty for their work, as this can protect against any complications that arise during or after treatment. The implant placement process can be lengthy, and a warranty will help ease the patient’s anxiety and uncertainty.

Restoration

As a result of dental advancements, implant restoration has become the preferred treatment for replacing missing teeth. It looks, feels and functions like natural teeth. It also offers additional benefits such as improved speech, enhanced nutrition and improved oral hygiene. Implants can replace single or multiple missing teeth and are a great alternative to bridges or dentures.

To find out if you are a good candidate for a dental implant, the dentist will first conduct a thorough oral examination and order dental X-rays. They will also likely recommend preparation treatment to ensure that you have sufficient bone structure to receive an implant, which may include a bone graft.

The surgery to place the dental implant typically involves opening the gum tissue and drilling holes in the jawbone where the metal tooth root will be placed. The surgeon will then attach the metal post to your jawbone, which will take time to fuse with it. This process is called osseointegration and can take several months, depending on your overall health and oral hygiene habits.

Once the implant has integrated, a replacement tooth is attached to it. This is known as the restoration and can be either a single tooth or several teeth replaced in a row (denture), or an entire arch of teeth replaced with implants and crowns. The dentist will make a model of your bite to create the new restoration, which is then based on this model. This ensures that the restoration fits and blends with your other teeth.

Although the success rate for dental implants is extremely high, it is important to follow your dentist’s or oral surgeon’s instructions for care and maintenance. Poor oral hygiene habits can lead to infections, which can damage the implant and surrounding tissues. Smoking is also a major cause of implant failure and can slow or inhibit the healing process. It is therefore essential to stop smoking if you are considering this treatment. If you have a medical condition that affects your immune system, such as diabetes or long-term steroid use, it can also slow or inhibit the integration of the implant in the bone.